
Lesson 4: The Winning Image
- Brampton Booster
- Jun 28, 2012
- Comment
Woah there! This is a REALLY outdated post. For more current and accurate articles visit my main page.
Yuri: Well, when you come right down to it in terms of a winning image, it’s kind of a lean deck.
Aichi: Winning…Image?
Yuri: Do you have a clear image of how you’re going to win with this deck? If you can clearly imagine that, you should be able to naturally understand which cards are necessary and which aren’t.
(From Episode 34 of the Cardfight Vanguard Anime)
So…How are you going to do that? How are you going to plan your deck?
The Setup
First, imagine your ‘perfect’ formation, and put anything you feel like. If you plan for a megablast stuff 5 unflipped in your damage zone and 8 underneath. Put out the highest power or pressure units you will use and combine it all together. Leave Triggers out, unless you happen to be using OTT and then stack whatever you need. All done? Good.
Now, show me the turn before. Show me what the field will be like before my final turn. Now, what I want you to do is arrange the field to the turn before your Final Turn. What will the opponent try to do? Remove your Rearguards? Rampage on the Vanguard? Set up dual intercepters and hope to cruise through the next turn?
Okay, so let me help you here. How do you want to finish off your opponent? Decks such as OTT stall and stall until the opponent is depleted of all resources, and then attack with a trigger boosted attack for the win. Because of this, they need a lot of guard, they need to stack either fast or consistently, and they need to survive in the End game. Both players will be at 5 damage for a few turns because of that. Spike Brothers on the other hand, have no real hand as they want to send the opponent straight to hell with high powered attacks. If the opponent is surviving a couple of turns after they have five damage you are actually tight spot, not your opponent, as your deck is not made for long games.
The turn before your final turn should do one or both of these two things: Deplete your opponent’s guard and/or survive to your next turn. Ezel is a great card to explain this. With it’s ability to call out another unit, you save guarding material in your hand and protect yourself for their turn. As well, it’s power boost will (hopefully) get rid of guard material so your next attack is assured.
Make sure everything you do goes towards your Winning Image. If your taking 4 damage early on to conserve your hand, but not think about whether or not you need that damage, then your making a mistake. A good way is Ezel again. No need to take the early damage; if you do, that extra shield is useless as you already have so much, and your opponent playing conservatively can decide to not guard Ezel’s attack, ruining his image. It is fine it you defeat an opponent before your final turn by chance, but never try to skip ahead to your final turn too early.
In accordance to this, also prepare for your final turn with the appropriate resources. Say you want to want your Bors-clone to hit for the last attack with a power of over 21k. To do this, you need to keep one damage unflipped until the end. If you have 5 damage, 3 flipped and want to use Ezel’s ability, your ruining the chance of that 21k attack. Unless certain(with cards like Claydol), unflippers shouldn’t be counted on to hit. It’s also okay to hold back. That means the opponent has to be wary about next turn as you bring out his Power next turn, and they know hitting a Rearguard might be useless as you can bring another out.
The Main line
Would you ride Ezel over a Garmore? Would you ride a Sagramore over Garmore? If you said Yes and no respectively, then you have formed your main card. This is very important if you want to create that winning image.
Take a look at your grade 3 line. Here is the line up for one of my friend’s RP deck(He can’t help it though cause he wants to pull everything).
2 x Alfred, 1 x SSD, 1 x Bors, 1 x Lohengrin, 1 x Gancelot, 1 x Brigette.
…What the…
If you have any more then two different cards that have effects that work only in Vanguard then trouble is looking in your direction. Let’s sort this to cards that work in Vanguard versus works in Rearguard(or ‘better’)
| 1 x Soul Savor Dragon | 1 x Knight of Conviction, Bors(Gancelot is not placed for obvious reasons) |
| 2 x King of Knights, Alfred | |
| 1 x Demon Slaying Knight, Lohengrin | |
| 1 x Crimson Butterfly, Brigette |
That’s 4 to one. At the very least, Alfred can use it’s effect in RG (Which is why he is used in MLB decks as a back-up and RG unit) but ouch. Since the Main Vanguard is Alfred, and SSD to finish it off, let’s cut it down to:
| 2 x Soul Savor Dragon | 2 x Knight of Conviction, Bors(Gancelot is not placed for obvious reasons) |
| 3 x King of Knights, Alfred |
Much better. Now we have no more conflicts, and we can use Bors more effectively. Limit the types of units with Vanguard-only effects to 2, though 1 is always preferred. That way, your deck will run much smoother.
The Backup line
In my pre-Jurrasic Tachikaze deck it contains 4 tyrant Death Rex and 4 Dinochaos. While there are two competing for the Vanguard position (and having no effect in RG) the Dinochaos serves as an important backup for the deck. You should only have 1 Backup. Not 2 or three, just one. As you can see in the Grade 3 list before, Even if you don’t get the Alfred ride, SSD is still okay in the beginning, and there is a great deal of flexibilty in an RP deck. (Or, if your going with MLB, Alfred can hopefully bring out whatever your missing and attack with a good number while your at it)
My friend’s proxy Shadow Paladin Deck contains 3 PBD, 3 PBO and 2 Dark Dicators. When I asked him for the reason for placing those Dark dictators he explained that was his back-up vanguard. That isn’t how a back-up works in this case. If he missed PBD he would have to ride either Dark Dictator or PBO. But he missed it becuase he only had 3 copies of it. You don’t want to ride PBO, because you need PBD in your soul. Also, since it needs a persona, 3 copies mean that riding it twice is a bad idea. But then, if PBD and PBO is both at 3, what makes you think your going to get a Dark dictator with two copies? Also, you need to run over that anyways, making it a minus card. All three cards is nothing in RG.
Remove all that confusion from that deck. Having 4 PBD and 4 PBO is better. Now you have a higher chance of getting PBD. Now you can ride PBO twice because you have 2 instead of 1 copies to spare. Back-ups are only if you need it. A back-up is used to fill in your grade 3 line so you have a higher chance of getting a usable vanguard. In fact, Blaster Javalin can help bring out PBD anyways. Having 7-8 GR3 means you need 3-6 for VG and the rest as RG. Taking this root, Another possible combination can be 3 x PBD, 3 x PBO and 2 Caar’s. The message is to keep your Grade3 line simple but flexible.
The Rearguard line
This area here is the most important for consistency. You want something to work indirectly with your main goal such as Bors. Rearguards are used to attack and either get the opponent to guard setting up a stronger attack with your vanguard or take it and propel your game. But they are also there for reliable attacks or defenses.
Another way to use rearguard is to set up combos. Alfred, again, fills this role as being able to bring out more units onto the field. An OTT deck can use the variety of drawing cards and anticipation to figure out what to do. That’s how they can bring out 21k and Crit Silent Toms and drawing Chocolats to guard for a longer period, waiting for that Trigger to pop up.
The Hand
There are some cards you just shouldn’t put down on the field. I’m looking at you Perfect guards. They still have to be part of the Winning image. Gancelot is placed in an RP deck to acquire Blaster Blade after you superior rode another one. It makes it seem like you still have 4 Blasters ready to go.
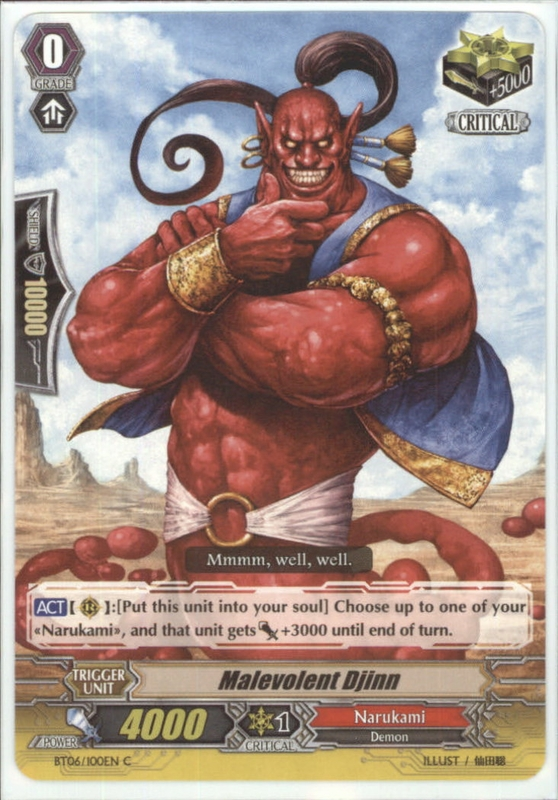
Now here’s a card that you put into your Narukami decks. But some people use it incorrectly. The only reason why this card is run is because a normal Narukami deck has 6 Crits minimum for its Winning Image. There is only two sets of Criticals and hence this is one of them. Its effect is not for use. Using it will greatly reduce your shield, and because you don’t use the soul either it’s like it vanished from your hand. Sure, you might be able to get magic numbers but 3k is really small and you’ll almost never find a good situation. So, pretend that it doesn’t have an effect, no matter how tempting it is.
Its effect is only used if you are building a Riot deck. Then, you can boost up to magic numbers due to the image, and help your soul. However, don’t try to use the effect otherwise. It’s an empty card.
##The Image
Let’s put all of this together. Have four columns labeled Main, Back-up, Rearguard and Nowhere. Here is a map of my pre-jurassic Tachikaze deck:
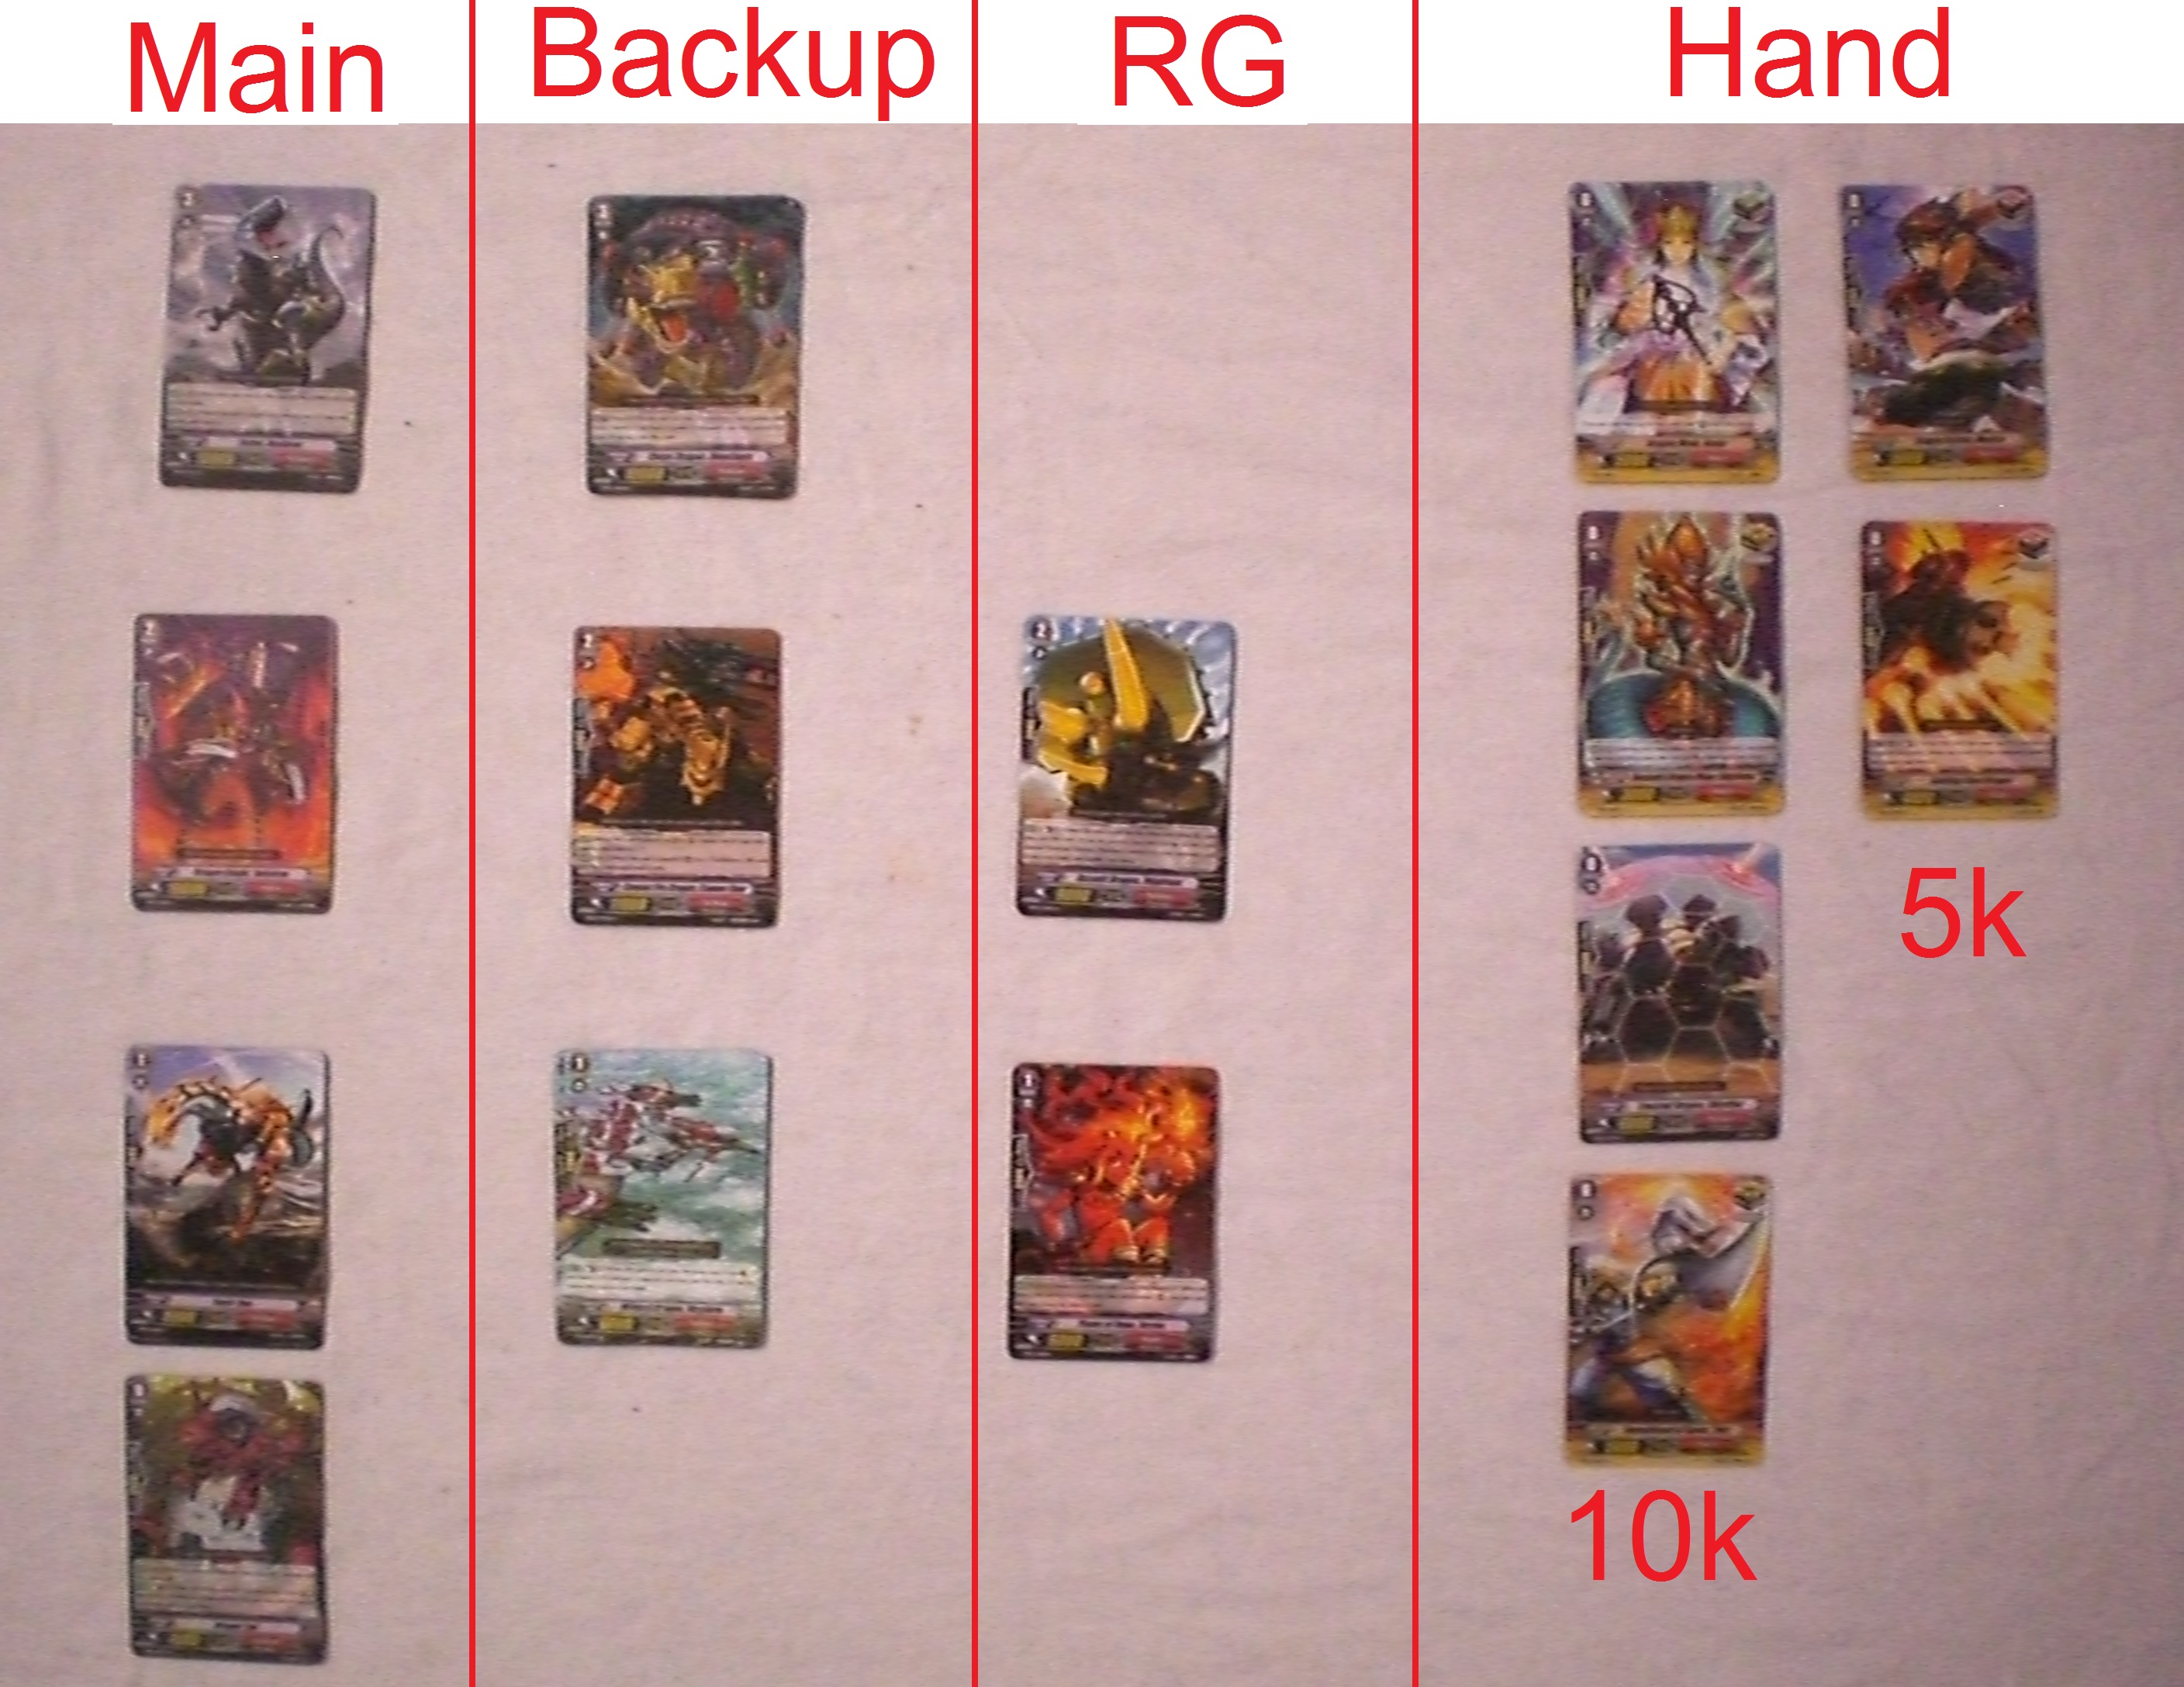
The first impression is that there is no card that can’t be put down, other then Triggers. That means unless we get a full trigger hand we can always do something. The main line is quite easy to distinguish and I have a solid backup line. Blightops(The GR2 in RG) can be the weakest link as it can be situational, but luckily both The Main and Backup line contain rearguard usable GR2. Does your image look as smooth as this? How many empty(useless) cards do you have? Can you replace them? Look back and see if you have only one backup line, one main line(and a possible second main). Everything else should be stuffed into rearguard and nowhere. But take care of your nowhere. Because every card there is a dead field card if you draw it. Just the same all the Rearguard cards are dead if you ride them, all the main cards have no use in Rearguard. Back-up’s actually have quite a bit of flexibility, so care needs to be taken so it works in both fields. Every card directly relates to the master plan, or survive in general.
A Cyrstal Clear image
So, there we have our Winning Image. The last problem that many people face is stuffing everything you want into one deck. Can you decide between two epic cards that don’t work well together? That’s the problem. The best advice I can give to you is: “Consistency before Flexibility”. If you look at all of my decks, I hardly run more then 2 different types of Grade 3’s, 3 types of grade 2’s and 4 types of grade 1’s. Why? Because even if this one card can save your day if you face this particular clan, it’ll be useless again all others. Almost all decks have weaknesses, so trying to cover to obvious weaknesses with random techs, you are missing out on the larger weakness which is a bad hand. So, the best formation in deck building should be along the lines of 4,4:4,4,3:4,4,4,2.
Keep It Simple S.
Final Adjustments
So, there we have our Winning Image. While playing, if you see something isn’t just up to stuff, you can change it. But don’t change it after a couple of bad draws or games, analyze why you lost, what mistake you made, and see if your deck could’ve handled that problem at its perfection. More about analyzing it is found in the next couple articles. But remember not to let go of your Winning Image. It needs to be crystal clear.
« Lesson 3: Ratios » « Lesson 5: Resources & Advantage »