
Lesson 5: Resources and Advatage
- Brampton Booster
- Jul 09, 2012
- Comment
Woah there! This is a REALLY outdated post. For more current and accurate articles visit my main page.
Resources go hand in hand with just about everything, but I choose now to present it since you now need to know the details before we move on. I’m not talking about rainforests or anything like that, but the costs you have to pay for abilities. Such things like counterblast, soulblast, limit break, and whatever.
Deck
We should consider a deck to be infinite for now. Note that Triggers are what makes an actual plus or minus here. If you bring out a trigger, then you lower chances to get one(duh). But not something from your deck, it’s just a variable in which you base your calculations from. Getting a plus in Vanguard is actually very difficult to achieve. The plus in [DRAW] Triggers seems so obvious, but there’s a catch. By reducing shield in half you survive for half as many turns, and the reason to draw cards is to use them on the field, not for guarding. And also it can throw you out of your trigger phase. Even if you go first, the opponent attacking and Drive checking first is countered by the fact that you Twin Drive first thus your first +1 becomes their later +1. An advantage has to be considered in respect to both players.
Damage
In normal play, there is 3 things you can do with the damage you have. You can use it to Pay costs, set of limit break, and possibly nullify our opponent’s [HEAL]. Damage is ‘free’ since it comes from the deck and you did nothing to get it. However this ‘free’ resource is scarce, even more so then the fossil fuels that we are pumping up. To make damage useful we need to use all of that, but to have the chance to we need to overextend what is available. Before I go any further, I need to say a [HEAL] trigger is likely to show up at least once a match, every match, so you really have 6 available spots. Make sure every damage you take moves you toward your Winning Image. By having more damage then your opponent, you can now use game-turning abilities while keeping their flimsy [HEAL] in prison. If you took damage for no reason, then you got a loss. You didn’t have any use for that damage and so you now have some odd unflipped damage floating in mid-air a turn too soon. Obviously, that’s how you lose, when you have no more guard and take such unnecessary damage. Setting up for a Counterblast however, can imprison your opponent’s [HEAL] and save guards.
Count up all the counterblasts you have. If you have 3 megablast units you have 15CB right off the bat. Obviously you’ll never do that but put that in. Count skills that can be used more then once to be only counted once. Make it simple. Unflippers only count as -1 if they are certain, if they need to hit they might be -0.5 or 0 accounting on the likeliness of using it. A deck should seldom seem to find their unflipper going through.
Taking the Garmore structure deck brings us with a grand total of 13. Let’s break that down into a Counterblast curve. We have only 1 unit that needs a CB of two, with the rest(11) sitting at one. This means we can bunch a pile of 1’s and 2’s to reach 7. But with higher costs we need to reserve more damage. Taking Dragonic Overlord’s (CB3) ability for example, you can hope to use it twice, or you can put in CB1’s to make sure you can use all that damage. Take advantage of anything that is free.
Now onto how much counterblasts should we use every game. Taking Narukami’s as the example again, you shouldn’t go for two LB in a match. Deathsycthe(CB2) is great for filling in that extra 2 open spots, and Saishin really shouldn’t have it’s ability activated ever. You can read my Narukami article(to be posted later) for more info on this. Build a list of CB you expect to use a game. If you find a card’s cost is really hard to fit into, then leave it out.
Limit Break
About the same with damage, but much better. It’s like doubling the purpose of damage, and is a really nice way to use effects. Limit Breaks are grouped into two categories, the ones like Garmore that have ‘free’ power due to limit break, and those who need additional effects. Obviously, you don’t want anything more the 4 damage when you need to use it. Limit Breaks are late game effects, and that means you should be pushed so easily to use LB. But you also need to set it off and start fighting back. Once you are at 4 damage, you need to start guarding more, so you have to let a fair attack so you can reserve your guard when the opponent starts. If the limit break is like Garmore’s, then it’s great. But a costed LB needs to handled a little differently. When you get late into the end game you start needing to pay higher costs, but limit break lowers that cost so you pay opening or middle game costs in the end game. That’s important to note, so you can pay higher up front. So if you plan on having high cost counterblasts, also add in Limit Break. Otherwise, your damage is too concise and limited.
Soul
First things first; soul is NOT free.
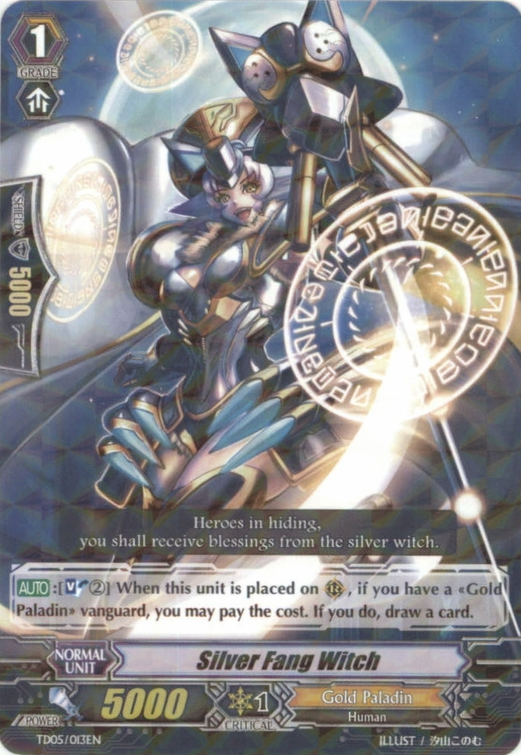
Silver Fang WitchLet me explain. For the first three turns, you ride a grade up. Because you are forced to (By forced I mean ride that darn perfect guard if you have nothing else forced). So you draw then ride, creating a floating zero. In other games you aren’t obligated to commit until your ready so that draw is a plus. However, that is a zero for us and it isn’t until we start twin driving until you get a plus. And that plus comes three turns later. As for the soul, because you are forced to ride it your soul it sits unused at a -3. Silver Fang Witch, to the left, makes use of this resource by letting you draw a card. You ride 3 cards, and luck bird gives back 1. Your still sitting at a -2 here. Even though the soul is just sitting there you had to either soul charge fast to get it out early(therefore minusing) or wait until you ride to Grade 3, which by that time most of the cards in your hand can be used. Being a 5k booster we also have to worry about magic numbers so we need a 10k or 11k before we bring this out. Silver Fang Witch however eliminates the sitting soul and cuts out ‘randomness’. This randomness I’ll coin from Alice (because it’s catchy) will be now deemed entropy. This entropy is the tendency for cards to have not be able to give us possible options. Entropy piles infinitely, by turn 3 our entropy becomes 3. But our drive check keeps us on top and eventually Silver Fang Witch becomes +1, had there been no other soulcharging or soulblasting occurred around then.
To make it easier to understand Entropy, let’s imagine paying a loan for say, a mortgage. At the start of the game you are in debt. Your draw becomes a ‘paycheck’, however you must immediately deposit that into your account. Every turn you pay until you have finished your payment (By riding a Grade 3). If you had been grade locked, or rode another unit of the same grade you just added interest to your account. But if then you finish your last payment (by riding a GR3), so your in financial freedom now!
Yeah, that’s not true. To get financial freedom you need to get more then you need. To gain back all the money you gave back you have to wait an additional 3 turns before you start to profit. That’s 6 turns. But your still not free yet. Unless you are some immortal being that doesn’t need food you are still paying, which in this case would be guarding. It is not until you accumulate a huge plus(like drawing 5 cards or retiring all Rearguards) that you can get away freely.
Soulcharging is a minus in the fact that you might be unable to use the resource, but since it comes from the deck, it’s okay. Moving things from the field or hand however will always be minus. Those moving triggers are red herrings, as they make you lose a guarding card for a pitiful effect. Other soul charging effects generally increase entropy since we can no longer use them (even in a Pale Moon deck, you can’t use all of the soul). At the end of the game, you’ll most likely have some soul sitting around.
Let’s take Blazing Flare Dragon as an example. Isn’t this card the best? I mean, Soulblast 5 to get rid of anything! Oh boy, remember what I said, soul is not free. First, how are you going to get that soul? Even if you don’t retreat your Grade 0 and use the superior ride, you have an amazing total of 4. Let’s, I don’t know, ride again? Now let’s see what you lost. You sacrificed Conroe, the chance to get any GR1 to your hand and eliminate Entropy caused by the first ride (bringing out Conroe gives us some wiggle room in Entropy). You also sacrificed a Trigger and a 7k booster, along with another Counterblast to get everything together. So it seems to be that you discarded 3 cards to get rid of one. Ya, it’s that bad and the boost isn’t even that good. If you bring out Conroe for say, one of the missing pieces you wasted a damage AND you still need one more soul. But if you play smartly and consider the soul as a resource you can play it better. Play smartly and put things in the soul not for that one purpose. Let’s say we keep Conroe in the soul like the last example(it’s only fair). Then we use the effect of 2 Kimnara. Kimnara has the ability to CB1 and move itself into the soul to get rid of one of your opponent’s GR1 Rearguards. Although that’s worse then a one for one(due to the CB) we can take advantage of the soul Kimnara gives and create a plus out of it. Using Blazing Flare Dragon you mitigate that CB2 by retiring one of your opponent’s Rearguards. 3 of the soul is due to riding cards(forced), and the other two are due to Kimnara. Kimnara tried to minus herself, but we managed to get a plus out of that. In total, we used up 2 cards and 2 counterblasts to retire 3 of the opponent’s rearguards, and got a nifty boost from it. Do you see how the soul can be used now?
Tally time. Put all those Soul charging cards and soulblasting cards together, not to mention the 3 that you are forced to have. Note that in many cases you actually have 2, due to every complete clan having a retreating First Vanguard. The trial deck obviously doesn’t have one, so the two possible paths to use soul is to use silver fang witch once, and use chargegal for everything else. And again check how much you actually use every game. In the perfect world, BFD would run rampage across with it’s ability, but due to Entropy we aren’t going to get the 2 Kimnaras we need every game. Most likely, if your using a soulcharging vanguard but not for it’s megablast, then you minusing a lot. Think about weather or not the effect you get by minusing 1 is beneficial, and if you can circumvent the -1 by using other effects continuously.
One more thing you can do with soul is counting them. Such effects like OTT’s Set 3 cards benefit if you have 6 or more soul. Having more then the required amount is obviously, wasting soul. Think about your soul’s limit, how much you have maximum at the end of the game regardless of the result. But make sure to include at least one soulblasting or soulcounting card because if you don’t it means your soul is sitting unused. You can omit if if you feel comfortable with that lost however, it’s not like a real mortgage.
Mega Blast

Heh heh. This biggy. It is the term for CB5 & SB8 coined in the anime from the megacolony guy(Isn’t that appropriate?). This is a very risky move, as it requires you to put everything to pull this off once. If you do use one, make sure you WIN.
Knight of Fury, AgravainIt’s not necessarily a Final Turn the turn right then, but you must assure victory by the next turn. this is because Megablasts are all offensive. CEO and Feather Palace look defensive, but they aren’t. CEO is to assure that you can survive next turn, and bring out a healthy assortment of attackers for a final push. Feather Palace resets your game, but keeps the opponent stuck in a spot where, the next damage kills them. the obvious offensive megablast of Agravain it to keep a bunch of pressure this and next turn for the win, and using it’s bulky defense to survive the opponent’s turn. As you can see, Megablasts are not a just a comeback move, it’s a double edged make-it-or-break-it gambit.
If you use a Megablast for defensive reasons, then you have lost. Counterblasts and soulblasts is used to return that Entropy. Megablasts are not part of that group. They are gambits, a huge one chance push that forgoes Entropy due being lopsided. In the late game where you use it, you are probably about to die as well. Megablast units should also be kept around 2 or less. The reason for this is that at the late game, you’ll probably have the card by now, sifting through most of the deck.
Not necessary a Megablast but more of higher cost abilities in general. If you don’t happen to have at least one, then your skills stay in the opening and middle game area. You can’t push them hard enough for them to tip over. If you don’t have a high cost ability, then you can put in more pressuring cards and 20k combinations. That way, you have to power or pressure push as if you had a high cost unit.
Realistically
Simply put, after you calculated the pile of everything you have and are going to use in a game, you need to actually think about a real match. A good way to replicate ‘unused’ cards is to take one out if you have more then 1. That means that if you have 4 perfect guards in a deck you should be using 2~3 copies every game. Also, note that some cards require conditions: if it needs to hit then the opponent might put up more guard to stop you, if it’s something else you need to factor in how easy it takes to achieve it. The Entropy of your deck also need to be calculated(Explained in my next article). After all of that, start playing games (like 42 times) and see what you have at the end of the game. If you have a good sized hand and your playing perfectly, then you might need to add or remove some guard. If you have unfliped damage see what can fill those spaces. Same with soul. Change around your deck until your Final Turn ends with nothing left to spare. That way you have done everything in your power to use every every last drop. At the end of the game, regardless of the outcome your total resources should be floating around zero. It doesn’t matter afterwards anyways; we don’t need to keep them for the next generation or anything.
« Lesson 4: Winning Image » « Lesson 6: Staging Formations »