
Checking the Morikawa Trigger
- Brampton Booster
- Nov 09, 2013
- Comment
Grade 3 checkers are pretty awesome. The plays that can result from an entropic card gives every clan a twist on conventional plays. Grade 3’s suddenly change from being a disadvantage that you swear at into a pseudo-trigger the opponent will cry at. The shortcoming is obvious: although you get free pluses for each check, you have no idea when a Grade 3 will appear. This is especially troubling as it is impossible to rely on a checker to shift the tide of the game. So is it worth running these Grade 3 checkers?
ENGINE
First, establish how much you get through a success in checking a Grade 3. By checking the indirect advantages most grade 3’s give a +1 (And for the purposes of convenience, Triggers are on average +2). So let’s consider Goku and Asura’s checks as equals for now. So checking 1 trigger gives the same advantage as getting 2 grade 3’s. Seems pretty lame.
But since checking a Grade 3 is a pseudo-trigger, you can increase the chance to get something from your drive check. A normal deck has the following odds based on a 49 card deck (I’m using exact fractions as an interesting result from doing this):
Chance to get 2 Trig: 5/49
Chance to get 1 Trig: 22/49
Chance for anything: 27/49 (55%)
Expected Indirect Advantage per drive check = 4*5/49 + 2*22/49 = 64/49
For a Grade 3 checker and just 8 Grade 3’s (the silent standard for decks):
P for 2 Trig: 5/49
P for 1 Trig: 50/147
P for 2 G3: 1/42
P for 1 G3: 25/147
P for 1G3&1Trig: 16/147
Chance for anything: 73/98 (74%)
*Grade 3 is usually a +1
Expected Indirect Advantage per drive check = 4*5/49 + 2*50/147 + 2*1/42 + 1*25/147 + 80/49
So in comparison to a vanilla deck; A grade 3 checker has a 20% increase in getting a trigger. In terms of advantage the checker gives (80/49-64/49) or 16/49 or ~1/3 ‘cards’ through drive check every turn. The checker (6 turns) would get you +2 on average every game, or +1 every three turns. Since you pay nothing in most cases, that frees up resources like counterblasts for other units to take advantage of.
GRADE 3 UPPER BOUND
What is, if there is, the best number of grade 3’s to run in a deck like this? Now that is a respectable question. So before we move on, consider what you lose in terms of shield when you have one more grade 3 then your opponent. Below is a small proof, but all you really need to know is that you lose 1/49 a turn.
“1 extra grade 3 means a loss of a \5/. A deck (8 G3, no DRAWS) has 16\10/+20\5/+4\15/(PG) or ~\6.531/per card. One more grade 3 will give an average of ~\6.349/. Since +\5/ is the stage for a +1 in advantage, the difference between the two is 0.0204 or 1/49 cards. This holds for any case; one more or fewer grade 3 and or draw affects the shielding by 1/49.”
For a Grade 3 checker and 9 Grade 3’s:
P for 2 Trig: 5/49
P for 1 Trig: 16/49
P for 2 G3: 3/98
P for 1 G3: 9/49
P for 1G3&1Trig: 6/49
Expected Indirect Advantage per drive check = 82/49
Okay, it went up. With 9 grade 3’s it differs by 18/49 in drive checks. But since you also lost a \5/, the total advantage is 17/49. In relation to 8 grade 3’s that is only 1/49 better (Which is like +1 in 8 games). Let’s do the same with 10 Grade 3’s:
P for 2 Trig: 5/49
P for 1 Trig: 46/147
P for 2 G3: 15/392
P for 1 G3: 115/588
P for 1G3&1Trig: 20/147
Expected Indirect Advantage per drive check for 10 grade 3’s = 84/49
Wait, what’s happening? It went up by 2/49 AGAIN. Since there is now 2 more Grade 3’s then normal the difference to the norm is 18/49. Actually, there is a formula to determine how much advantage you have over the opponent depending on your garde 3 level:
Advantage per check(x,y) = (2x+y)/49 D{x belongs to Z, 0<=x<=34}
; where x is the number of grade 3’s you run
; where y is the deck stage difference:
; y goes up/down by 1 for every 1 [DRAW]/G3 your opponent has more/less than you.
Putting it to the test, 10 Grade 3’s means you lose 2 stages so A(10,-2) = 18/49.
By extrapolation, the upper limit is 34 (triggers must fill 16 spaces). This gives us a 106/49 or 2.2 every turn(Compare to the standard 64/49=1.3, that’s not even double the original). This amount of grade 3’s is ridiculous even for Morikawa.
Since there is no defined stage, let’s establish a different point of view to find the recommended number of grade 3’s to run. The easiest criteria is grade locked odds and see if it drops below the safe 20%. This limit is 13. There are ride chain cards but let’s assume 13 is the highest we shall go without getting into the messy stuff.
RECOMMENDED RATIO
Find different positions in advantage. It can either by dependant or independent of your opponent’s deck (By dependant, the values are higher if they include draws, and lower if you run draws as well):
#G3 for 80% to get anything: 11 (independent)
#G3 for 90% to get anything: 17 (independent)
#G3 for 33% G3: 9 (independent)
#G3 for 50% G3: 14 (independent)
#G3 to get +1 2/3 from drive check: 9 (independent)
#G3 to get +1.8 from drive check: 12 (independent)
#G3 to get +2 from drive check: 17 (independent)
#G3 for equal advantage as CEO: 14 (independent)
#G3 for +1/4 CEO: 26 (dependent)
#G3 for +1/2 opponent: 16 (dependent)
#G3 for +2/3 opponent: 25 (dependent)
>Download full data sheet
*CEO has a 70.4% chance to check a trigger, and gets +1.76 per drive check.
Based on the data I’ve decided to display at your convenience:
> Note that the least number of Grade 3’s to run is 9. With 9 you have around a 75% chance to get a trigger, and around a +1.67 per drive check. That isn’t to say you should run 9, oh no, hardly.
> 16, 17 and 25 are both over the specified maximum (13)
> 12 G3 allows a +0.4 from the opponent every turn. Or, a +1.8 every turn. Chances to get something approach the certain mark of 83%.
> 11 G3 is lower than 12 in stats, though that is obvious. {0.39, +1.76, 80%)
It is a close battle between 11 and 12. The winner depends on the deck, however for the rest of the article I’ll assert 12 grade 3’s. [The values for 12 are much easier to work with]
RETURN TO DECK
Gancelot, Edel Rose and Jelly Beans all reducing the need to add more grade 3’s while increasing the chances of getting grade 3’s in drive check. This two-fold ability is extremely hard to calculate. By guesswork a bit of testing each grade 3 doubles itself so 4 Gancelot pops in 4 more grade 3’s in comparison. Since I’m too lethargic to compute the real numbers, take this estimate as much as you would trust a clerk. Regardless of the odds, copies of these cards yet again increase to odds for grade 3 checkers and would give more +1’s over a shorter period.
COMPARISON
So after this discussion, we need to compare it to non-vanilla units. Most units have slight minuses in terms of their ability, but some do benefit with their effect. So let’s consider a unit like Garmore.
In terms of advantage over each other (norm vs 12 G3):
| Turn # | | | 3 | 4 | 5 | 6 | 7 | 8 | 9 | And it’s most likely game around here |
| Normal | | | 0 | 0 | 1 | 2 | 3 | 4 | 5 | |
| Checker | | | 0.4 | 0.8 | 1.2 | 1.6 | 2.0 | 2.4 | 2.9* |
One thing to assert is that we assume all other rearguards are just vanilla or something equally unusable so we are left with a 15|20|15 or something similar to both sides. As you can tell, grade 3 checkers are a bit below Garmore if the opponent RUSHES to reach 4 damage. Correct pacing will get limit break around turn 6 so you may find checkers more reliable (If they weren’t pacing, you will have an easier time to finish them off before it reaches to Turn 7)
Counterpoints:
I’m playing very nice here, because power isn’t necessarily a +1 for vanguards. This is especially true against PG’s as they will shut out any form of power boost. During those turns Garmore will +0. Since guarding Garmore takes amount the same number of cards, Deck’s with sufficient guard quality mitigate his use.
To offset my generosity in +1’s in power, all checkers that gain power just so happen to meet up with Garmore’s +1 toe to toe.
I compared checkers to Garmore because both types get their advantages for free. But the pluses the various checkers receive are unique and disordered. One checker can be +1 and another +3. In fact, the chart follows almost no checker following. So why have it? Simply to show the minimum ability for a checker if they had to solo without any support and shenanigans.
APPLYING ADVANTAGE
The best way to use checkers is to pair effects redundantly. If a checker retires, then add in retirement cards. If a checker stands a unit, put in stands. This ensures that on turns where you do not get the grade 3, your advantage system still works. The problem for many people is that they see that checker can do something, and they can see what benefits from that something, but have nothing when that something fails. To change a checker’s gimmick into an actual strategy, cards must revolve around the checker’s central idea. Synergy with support cards is the key to a good grade 3 checker.
GALLERY
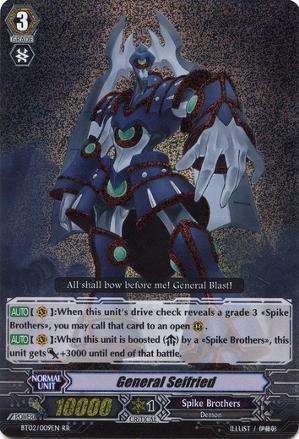
General Seifried is one of those cards which is very dependent on chance. This removes about half of Seifried’s vitality, as there is since you can check one when the field is full and not checking one when the field is empty. This makes Seifried builds very technical and requires A LOT of practice to know when to return and when not to return. In the best case scenario, the opponent has to deal with a potential 23|23|21|16|16 crush rush. Worst case scenario, the opponent deals with 23|23|21. Seifried is undoubtedly a revolver of pain.
Seifried gets a secondary effect, which may increase its attack to 21k and force more guard. Compare it with Garmore at Limit break, both units get +1 a turn. The difference is that Garmore can use a 6k while Seifried needs an 8k. This is not a large problem, so Seifried the same plus as Garmore. So if you look at the chart above, you would remove all the pluses Garmore got and see that you’ll always be above it.
Before we get into the odds of checking cards, we have some self-returning units to look at. Jelly Beans and Juggernaut Maximum increases to grade 3 count from 12 to a virtual TWENTY. Every turn, Seifried checks pick up speed and the advantage starts adding up. Juggernaut Maximum is a standard for Spike Brothers, but its skill fits nicely into Seifried’s own skill. As Juggernaut tags out, it increases the count by one. Seifried checks a grade 3, which slots right back into the space Juggernaut had left. Jelly Beans is also amazing, as it returns itself from the hand to bring out a \5/. That \5/ is any Dudley unit, so it plays the role as a pseudo-grade 1/grade 2. So even with 12 Grade 3’s, you actually have an above average chance to ride up properly. (a 13:8:12 ratio is 88%).
The raw advantage you get each turn is+1.96. A ‘standard’ deck gets +2.12 a turn. What? The reason is getting 2 grade 3’s gives a +2 generally, but still +1 in a Seifried deck. If you decided to return both units, you get +1.47 instead. But Seifried IS better than a checker, because you need to compare it to the norm.
A checker will need 20 ACTUAL grade 3’s, so you receive a 8/49 bonus. A checker gets +0.5714 more than the opponent every turn. But Seifried gets +0.5731. Compared to each other, Seifried has a +0.0017 a turn. That is so insignificant, we shall treat Seifried’s advantage as a normal checker.
As a normal checker with a +1 from the second skill, it should make sense that the endgame {+3.0 Raw Average; +1.57 Versus Norm}

Sword Magician Sarah’s effect also has just about the same amount of advantage as a ‘standard’ checker. Standing a grade 3 grants one more attack which wastes one more \5/ for the opponent (+1). Regardless of the stage of the game Sarah is in that advantage is not going to depreciate.</p>
Sarah takes Seifried’s bonus and makes it her own, making that wonderful plus go her way like Garmore. Since Pale Moon have tricks in field management that makes Sarah even better at getting that plus.
Pale Moon have an interesting unit by the name of Fire Juggler, one that can potentially extend Sarah’s check to become a +2 for just one use. But what are its negatives? 1) You lock out non-stand triggers to make 2 different attacks, or 2) You focus on one column and hope the opponent doesn’t have a \10/. Fire Juggler is way too limited and is not support for any kind of deck. Do not use.
Instead, Sarah has support in the form of Power columns: Turquoise Beast tamer and Midnight Invader combined can form a 21|21|21 line with the added option of getting a ‘stand’ every so often (43%).
Before special support, Sarah is +2.7, a bit below Seifried. However, with an extra \5/ in each column provided she can hit an {+4.2RA;+1.80VN}
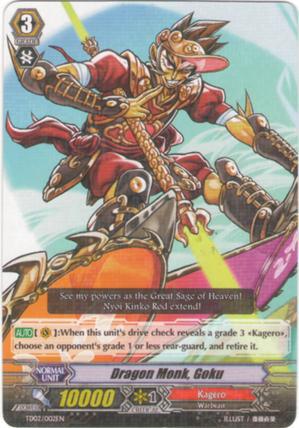
In terms of advantage, Dragon Monk Goku and Rumble Gun Dragon is strictly a +1 like Sarah, and could be worse considering Sarah offers an extra attack that could lead to damage if the opponent is unable to guard(Damage is worth more than cards). Also unlike Sarah, these units have no boost abilities nor any columns that make 21k.</p>
What makes Goku better is to answer “What gets retired”. Many boosters are mediocre 6k or 7k unit with on-call effects, and destroying one would allow a replacement ready to deploy. The only way to extend the advantage is if the opponent lacked a replacement, and since a Trigger booster can still force \10/ from a 10k base that advantage might not come up.
However, some units will ensure you receive a compensation. Laruel is the best example, because killing it can shut down an entire strategy for Dimension Police. Gunning down 10k and 9k boosters also provides advantage, because you’ve destroyed a column that usually forces out 2 cards a turn into something more innocent. Vanilla 8k are anchor units, so Goku can wreak certain attackers. Retirement is extremely disruptive and can make most technical decks suffer. So whether a retire checker is good or bad depends on the deck it faces. If it were not for the support.
Back to advantage for a minute, how much would you expect from a retire? The advantage per retire shifts depend on retire quality and retire frequency. Consider what happens when an opponent’s back row is completely obliterated. One would try to fill up the spots, but it will be unlikely all would be filled so quickly. In that case, the opponent will be attacking with a half-column, which will reduce the amount of shield you need by \5/ minimum.
Given 14 grade 1’s (the standard), a grade one is found nearly every turn. So even a full wipe still wouldn’t knock them out. But as I mentioned not being able to replace will incur another minus. Redundancy in retirement is what will allow this minus to occur. Notice that both Rumble Gun and Goku has access to a CB2-retire1 unit; running 4 and you get a following table:
| State of game | CB2 | Goku | Variation | Over Norm |
| Before game: {[3][4]} | 1 | 1 | ||
| Turn 1 and Damage: {[7]} | 1 | 1 | ||
| Turn 2, drive & damage: [9] | {[10] | [11]} | 2 | 2 | ||
| Turn 3, drive & damage: [12] | [13] {[14]} | [15] | 3~2 | 3 | ||
| Turn 4, drive & damage: [16] | {[17] [18]} | [19] | +1 | +1 | 2~1 | 4 |
| Turn 5, drive & damage: [20] | {[21]} [22] | [23] | 3~~2 | 5 | ||
| Turn 6, drive: {[24] | [25]} [26] | +1 | 3~~1 | 6 | |
| Turn 7, drive: [27] | {[28]} [29] | +1 | 3 | 7 | |
| Turn 8, drive: [27] | {[28]} [29] | +1 | 3 | 8 |
Not the most practical way to arrange information, but it is in basis a look at how retiring will affect the opponent’s ability to replace it. As you see in turn 4, you expect to retire 2 while the opponent only returns one. This gives you an extra +1 for the following turn. Then as your grade 1 count increases the opponent’s grade 1’s stagnate.
Although placing down a perfect guard is not a large disadvantage for the opponent, ill feelings come along to dissuade such ‘drastic’ actions to take place. Should a perfect guard stay in the hand, the deck benefits from yet another +1 for some time. By itself a retire checker can generate 3-5 pluses, while it will become 6-10 with support. As support only pops up twice, the advantage by the checkers is 4-8. Given leeway to the lower deviation of support we have +5. Again without consideration to special rearguards, the amount of advantage generated per retire is +5/3. With that in mind, the advantage is {+2.1RA;+0.73VN}
Rumble Gun is exactly this advantage for not being able to have any back row sweepers other than Dragonic Deathscythe, and lacks some synergy with the main Narukami variant. It is not a bad advantage as certain decks just can’t cope with retirement. Both the Sarah and Seifried decks above will go from astounding +4.2/+3.0 all the way down to +1.7/+1.7.
Goku has the advantage of entirely controlling the back row with its wealth of support cards (Kimnara, Beserk, Tejas and Heatnail), making it extremely easy to sweep the field and deprive your opponents options. Although the opponent is perfectly able to replenish boosters if you retire them every two turns, wiping the field with several retirement cards can keep the opponent far below its maximum power. Beserk synergies the easiest, as Goku frees up Counterblasts for repetivtive Beserk. Tejas is another good card because it does not minus like Kimnara and Heatnail, and with a Jarran behind it the opponent will need to waste 2 cards to save 1, so you win either way. Kimnara would be for units that you must retire and you can not wait for a Goku. Due to the additional options to retire, the advantage shifts up to {+2.3RA;+0.90VN}
Random data dump…I forgot how it was ordered originally…
| Before game: {[3][4]} | 1 | 1 | |
| Turn 1 and Damage: {[7]} | | 1 | 1 | |
| Turn 2, drive & damage: [9] | {[10] | [11]} | 2 | 2 | |
| Turn 3, drive & damage: [12] | [13] {[14]} | [15] | 3~2 | 3 | |
| Turn 4, drive & damage: [16] | {[17] [18]} | [19] | +1 | 3~2 | 4 |
| Turn 5, drive & damage: [20] | {[21]} [22] | [23] | 4~3 | 5 | |
| Turn 6, drive: {[24] | [25]} [26] | +1 | 4~~2 | 6 |
| Turn 7, drive: [27] | {[28]} [29] | 5 | 7 | |
| Turn 8, drive: [27] | {[28]} [29] | +1 | 5 | 8 |
+3~+4~+5MAX
| Before game: {[3][4]} | 1 | 1 | ||
| Turn 1 and Damage: {[7]} | | 1 | 1 | ||
| Turn 2, drive & damage: [9] | {[10] | [11]} | 2 | 2 | ||
| Turn 3, drive & damage: [12] | [13] {[14]} | [15] | 3~2 | 3 | ||
| Turn 4, drive & damage: [16] | {[17] [18]} | [19] | +1 | +1 | 2~1 | 4 |
| Turn 5, drive & damage: [20] | {[21]} [22] | [23] | 3~~2 | 5 | ||
| Turn 6, drive: {[24] | [25]} [26] | +1 | 3~~1 | 6 | |
| Turn 7, drive: [27] | {[28]} [29] | +1 | 3 | 7 | |
| Turn 8, drive: [27] | {[28]} [29] | +1 | 3 | 8 |
+6~+8~+10MAX

The largest family of checkers includes (Crimson Butterfly, Brigette;Knight of Endurance, Lucan;Schoolbag Sea Lion;Sword Emperor, Dragonic Valblade). All gain 5000 for the attack. I find it lame compared to the other checkers, as none of these cards have an effective setup to use its power boost effectively. Since the opponent does not need to guard the vanguard until the endgame, pluses are reduced by 2. Of course, the opponent must exercise extreme caution when guarding. As both Grade3’s and Triggers increase these checkers, they have the uncanny ability to break 2-passes easily (With 12 Grade 3’s that is 32% of the time). Due to this, no-passing the vanguard there is still evokes the 55% trigger chance (Meaning the opponent -1 as before).</p>
To make units like this good though, you need to create a situation in which 2-passing the vanguard would be considered a WORSER (spelling mistake on purpose) option then 1-passing the vanguard. Now that may sound like crazy talk, but it is possible if you have AT LEAST 19 Grade 3’s. If you were to look at my decks, the only checker of this type belongs to Royal Paladins Double Butterfly, as Gancelot extends Brigette from 17 physical targets to 21 virtual targets.
*For the math, check the fight matrix and adopt a ‘all to vanguard’ strategy for you and a 2-pass and 1-pass strategy for the opponent. The advantage of one over the other is VERY slight, but nonetheless makes the 1-pass option the optimal versus the 2 situations. (Though no guard/Perfect guard is still better)
Here is the dilemma. The opponent can use an extra stage to guard with, making you +1, and allowing you to add any triggers to the rear-guard. Then you get the normal pluses for trigger checking, giving you a +2.3 in total. The other option for the opponent is to two-pass. In this situation, you have an all or nothing. If you do not get 2 ‘trigger’ units in a row, you got 0. When you do get something, you reap a large reward being able to break the guard AND deal damage. The extreme pluses from breaking a guard against the higher chance of failing makes your ‘average’ value +2.5. Pick your fate. Note that ALL these calculations are only for a Brigette deck. Sea Lion or Lucan can get lost.
So focusing on Bridgette decks, there are a few extra support cards you may try to add like Knight of the Explosive Flames Palamedes, Fang of Light Garmore, Holy Disaster Dragon, and Exculpate the Blaster. The nice thing is that every 21k+ column creates another +1 for a Bridgette deck.
17;4 Bridgette/4 Gancelot/4 Fang of Light/4 Knight of the Explosive Flames Palamedes/1 Exculpate the Blaster
4; Blaster Blade
12; 4 PG/4 Marron/4 Snowgal
17; Barkgal/10CRIT/2STAND/4HEAL
This decision-making is only if the opponent has to guard the vanguard and they have no perfect guards. Since perfect guards ruin everything, the only situation is when the opponent can not afford to take the vanguard. But if both you and your opponent plays at their best then you can expect a minimum of {+3.3RA;+2.00VN}
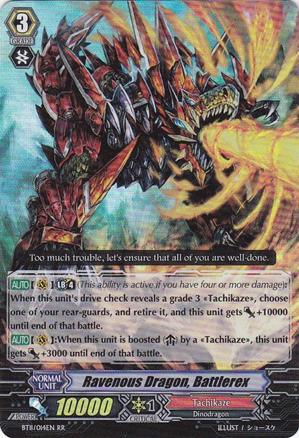
Being the first ever Limit Break grade 3 checker makes Ravenous Dragon, Battle Rex an underdevelopment. It cuts off the ability to gain 1-2 cards from the early game. But let’s look at the skill: It gets +10000 instead of the conventional 5k booster. Similar to the previous power checkers, there is no need from the opponent to guard your vanguard early game, so Limit Break isn’t such a huge problem. What gives us the problem is nature. Average values happen over several turns, so if you lower the amount of turns the more choppy the chances are. Choppiness of the pluses we get will be our downfall.</p>
Like Sarah, Battle Rex has boost ability which is nice,Interestingly enough, Battle Rex wins over almost every unit in the game by shooting for a grand finale of 57000 POWER (6% chance). It does however need a break ride, 2 Slash/Beam, and Sonic Noa boosting.
*Tyranno Legend maxes at 49k, Colonel tops out with 53k. Ezel EQUALS but only has a 1% chance. Only DI can really surpass it)
Recall that a standard check +5k breaks 2-passes 32% of the time given 12 targets. Well, Battle Rex does it 54% with the same conditions. These odds make opponents very uncomfortable with the idea of being penetrated. To keep themselves from being touched they guard for about 31k total. If you happen to have Splash/Beam strolling along you can eat and up and *gasp*, that 18k column just went up to 31k. (With 43% of doing just that). Even without the one of the two units you really should have there is STILL a 22% chance of breaking that guard. If your opponent both smart enough and unspoiled they can plop down \25/ (\10/ more than average). Yay! +2 even if you get NOTHING in your drive check! This extremely nerve-wracking experience can really throw an opponent off thier game, and can cause opponents to become increasingly uneasy around this unit.
opponent has 10/11k vanguard:
| Shield used | Chance to pass | + from shield ALONE | Expected value(minus + from shield) |
| \15/ | 53.6% | 1 | +2.16 |
| \20/ | 43.4% | 2 | +2.51 |
| \25/ | 22.9% | 3 | +1.81 |
| \30/ | 5.6% | 3 | +1.38 < Enough shield |
| \35/ | 5.6% | 4 | +1.38 < Misplay – previous does the same |
| \40/ | 0% | 4 | +0.82 < Best scenario |
| / | 100%(But doesn’t hit :P) | 0 | +0.82 < Worst scenario |
This whole string of undesirable choices is easily negated by a perfect guard. It is even worse than guarding a power checker like Bridgette, because Bridgette can still fall into the reserve +1.3 and act like a non-checker, but Battle Rex will need to sacrifice units regardless (+0.8 and not +1.3 as shown).
The most threatening thing about Battle rex is that MANY fighters do not understand how to guard against this unit properly, either having them end up wasting way too many cards or looking at a premature KO. An opponent that plays perfectly is looking at {Average +3.3}

Death Army Lady and Death Army Guy and Asura, because one grade 3 can stand an entire column before activating Asura’s effect. Along with the Army, Riot Horn is great as it stands along with whatever you stand in front. As Riot Horn is a forerunner, Asura can create a formation that stands the entire field with one grade 3, to get a minimum of +2 instead of +1. Let’s consider Asura’s normal R>R>V formation with only 8 grade 3’s:
P for 2 Trig: 5/49 P for 1 Trig: 50/147
P for at least 1 G3: 57/294 P for 1G3&1Trig: 16/147
Expected Indirect Advantage per drive check = 401/196 ~= 2.0</p>
What!? That’s almost 2 every turn! Considering an average checker needed 17 Grade 3’s to fill the same shoes, Asura is amazing. There is a catch though. For Asura to work its magic, it needs to attack R>V>R. If you want to take it all the way, 12 Grade 3’s and 12 Stands will make Asura +2.2. Not a huge difference in raw advantage, but a nice jump to the norm (0.74 to 0.85).
Dancing Wolf is another unit that many players forget, and that means Asura is better at its job. If Dancing Wolf boosts Asura and the opponent guards to 26000 that is a two-to-pass right? Not if Asura checks a Stand, because standing dancing wolf increases Aursa’s power up to 21k before you apply the power. To prevent such a horrible technique from succeeding, the opponent guards with 30000, making you +1 just like the power boosters of Sarah and Seifriend, abet subtler.
Asura Kaiser is the only checker that has an 11k base. This is defensive enough to stop silly 15k and 20k columns other checkers have to deal with. I have no extra number attributed to Asura due to this, but in real games it may increase the advantage by one or 2 over other checkers, which is a really sweet deal.
Azure Dragon and its crossride are 11k beaters which help Asura both on the field and in the deck, AND make great backup units (You may either switch to standing pressure with Azure, keep defense with Illumial to offset the surplus of grade 3’s, and use the unused counterblasts to force stand and end the game).
The extreme wealth of support make Aursa a brilliant checker to use:
> Only checker with 11k base
> Huge array of checker support (In fact, it is the largest)
> Great back-up vanguard support (All sporting 11k+ bases as well)
> Average {+3.2}
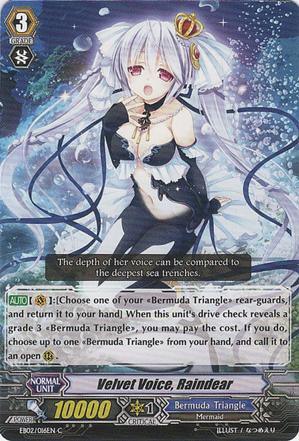
Velvet Voice Raindear favors DIRECT card advantage with Wedell, Rio and Carine. Being the only checker that brings in direct advantage is a definite advantage which makes Bermuda Triangle such a difficult clan to break through. Checking a grade 3 will give you the same advantage as a trigger, if not better. It takes the stand part of one trigger and the draw advantage with the other. Pretty sweet.</p>
Comparing Raindear to Asura:
> Velvet Voice has back-up support (Flores and Tyrhennia) that ensures you gain advantage on empty turns.
>> In the same branch, Velvet’s backups plays the same role as Velvet if she is not present.
> Asura needs a specific formation of about 4 units, but Velvet only needs to pull one of 9 possible targets.
> The strategy most effective for Asura is R>R>V, but Velvet can go with the better R>V>R battle plan.
>> Because of this, Velvet gets to use non-stand triggers and the power will not fizzle out.
> Finally, Velvet does not suffer if you drive check 2 grade 3’s, being able to still guard on the opponents turn (Asura only needs 1 grade 3 to fulfill the ability, and then another stand/grade 3 is redundant and removes the possible advantage)
Asura has 11k. It also has more offensive pluses, plus a load of solid (though not directly related) back-up options. This is why it is difficult to decide which unit is better. Velvet gets a +2 regardless of a grade 3 or trigger checked, so it gets +2.3 every turn.
The other option with Velvet is to combine it with the new returning Bermudas, which gives power per return. I find those units are not for Velvet. So regardless of what you do Velvet will stay at exactly {+2.3RA;+0.90VN}
What about <Insert the newer JAP cards>?
Well, excluding Acabus bear (which is inferior to Leopald), and BattleRex(I’m a sucker for Tachikaze) most of the new grade 3 checker are bad. The biggest reason is that checkers are highly chance based, so riding them early is essential. Otherwise, you are opening up standard deviation to kick you in the ass. Especially those that work on only one turn (*cough*Daikaiser*cough*). The advantage gained is inferior to the risk it carries. Nicely, if you just so happen to check a grade 3 for the remaining three turns you have you can jump over most advantage for limit breaks, but in honesty you’ll be fortunate to land even one.
Those you may find it nice to see new grade 3 checkers these are blasphemies to the nature of the advantage. If I find a good checker, I’ll update it.
BEST ADVANTAGE TABLE
| Without Support | With Support | Versus Normal | Notes | |
| No checker/Normal | 1.3 | 1.3 | +0.00 | |
| Standard Checker | 1.8 | 1.8 | +0.41 | |
| Seifried | 1.7 | 3.0 | +1.57 | |
| Sarah | 1.7 | 4.2 | +1.8 | most of the advantage comes from 21|21|21 alone |
| Goku | 2.1 | 2.3 | +0.90 | Disruption can drop the advantage all other checker have |
| Bridgette | 2.3 | 3.3 | +2.00 | |
| Battle Rex | 2.5 | 4.5 | +1.12 | |
| Asura | 1.8 | 3.2 | +0.85 | 11k base is so much more useful than you think |
| Velvet | 1.8 | 2.3 | +0.9 | Only checker to gain direct advantage |
Conclusion
There are checkers where advantage is easy to find (Sarah & Battle Rex), others that are more subtle (Asura & Goku). All checkers have unique abilities that are difficult to find (Seifried), while others are an obvious giveaway (Velvet). Through all of it, the largest factor in determining a good checker is not by its own effect, but rather its support cards that redundantly support its main idea. The more support, the more synergy, and the more success in defeating an approaching enemy.